Professional service resources

Technique & Support

01

Operation & Maintenance

1. Blade Drive

Inspect the blade drive for cracks, wear or excessive movement whenever cutting performance drops. Disconnect the clipper before replacement and make sure the new drive is seated evenly before reinstalling the blade.

2. Lubrication Guide

Apply clipper oil to both ends and the center of the blade before operation. During continuous professional use, clean and lubricate regularly to reduce heat, friction and premature wear.

3. Routine Maintenance

Brush loose hair from the blade, air inlet and housing after every use. Inspect the cable, charger, blade latch and moving parts, and store the clipper in a clean, dry place.
02

Mechanical Structure & Engineering

1. Blade Drive System

The motor transfers motion through the drive lever to move the cutter across the fixed comb. Correct alignment and controlled movement are essential for low vibration and consistent cutting.

2. Key Functional Components

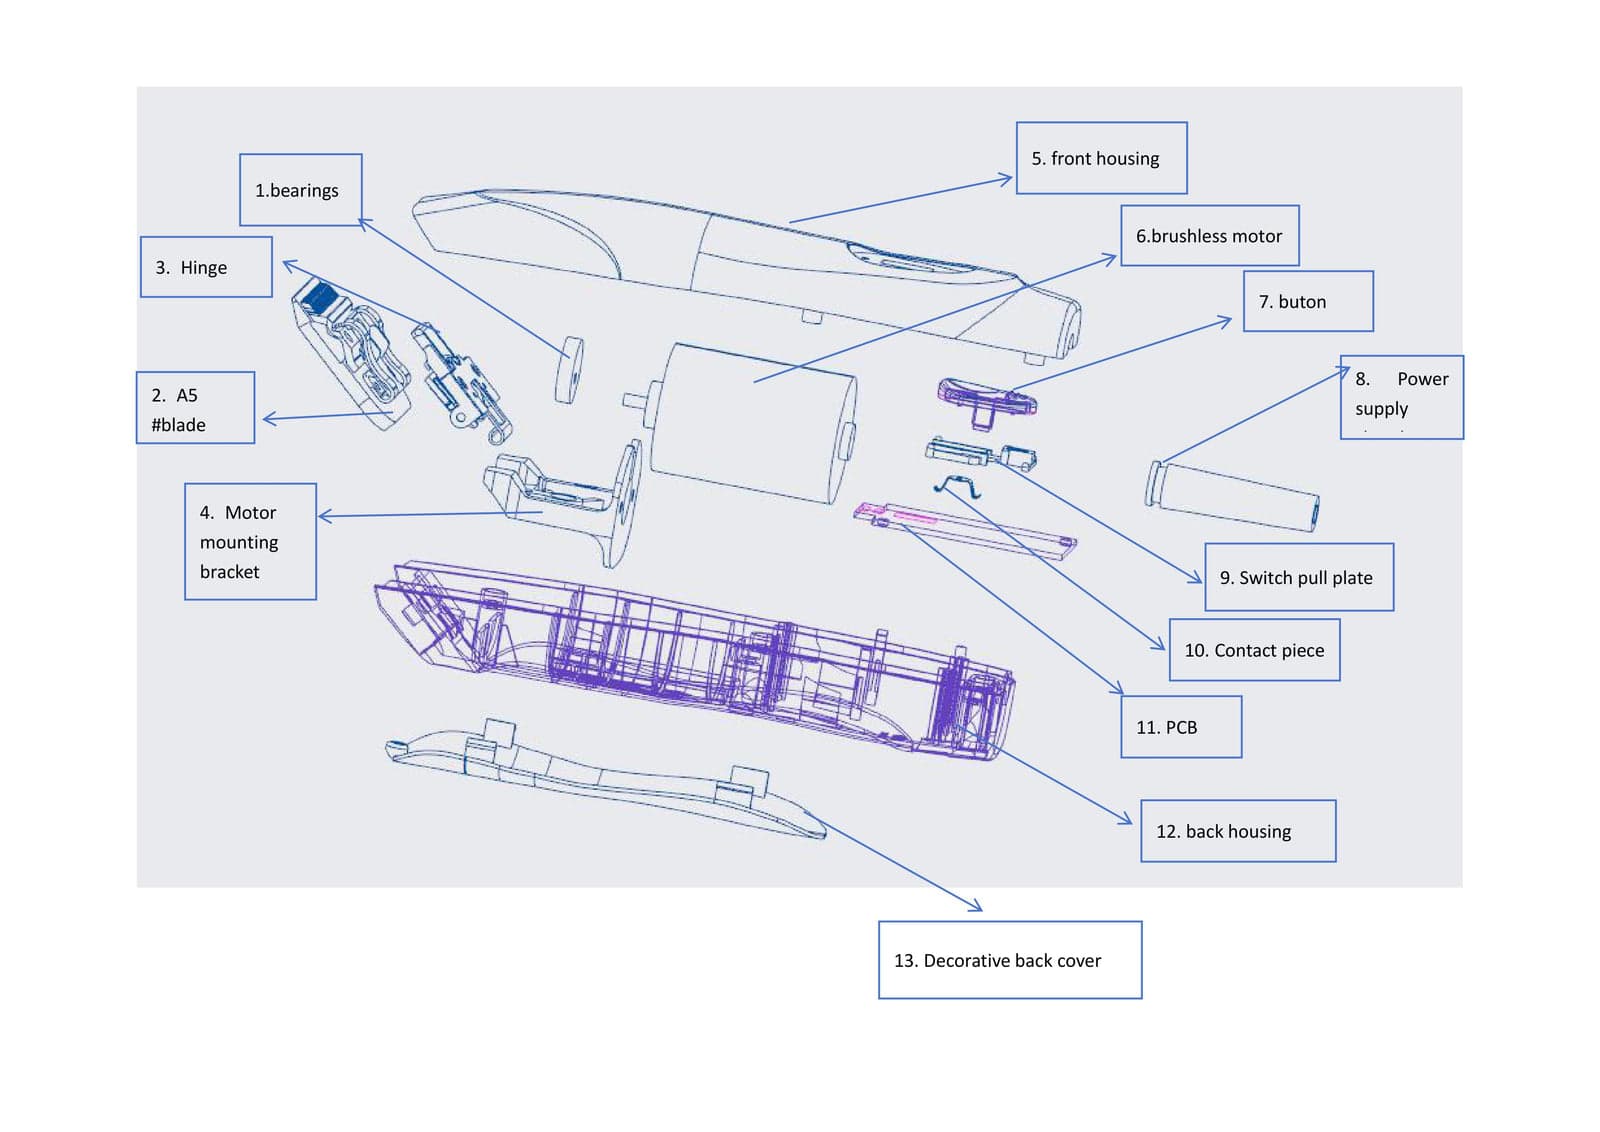
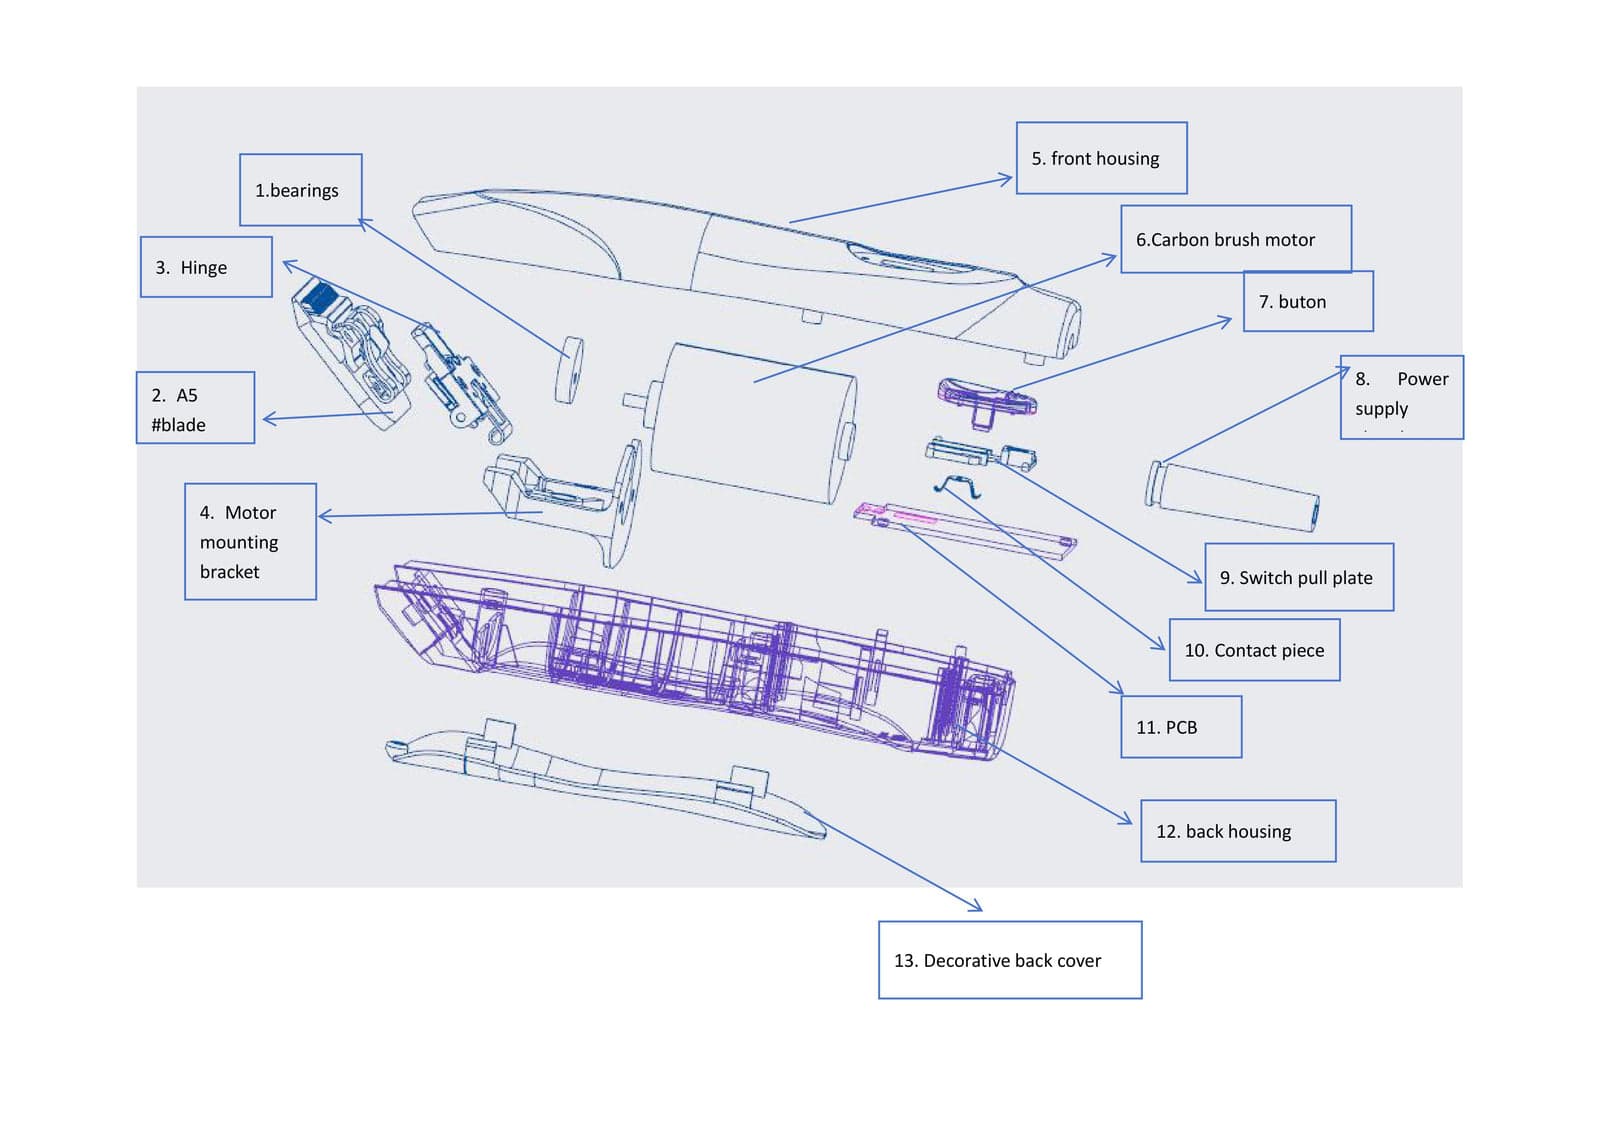
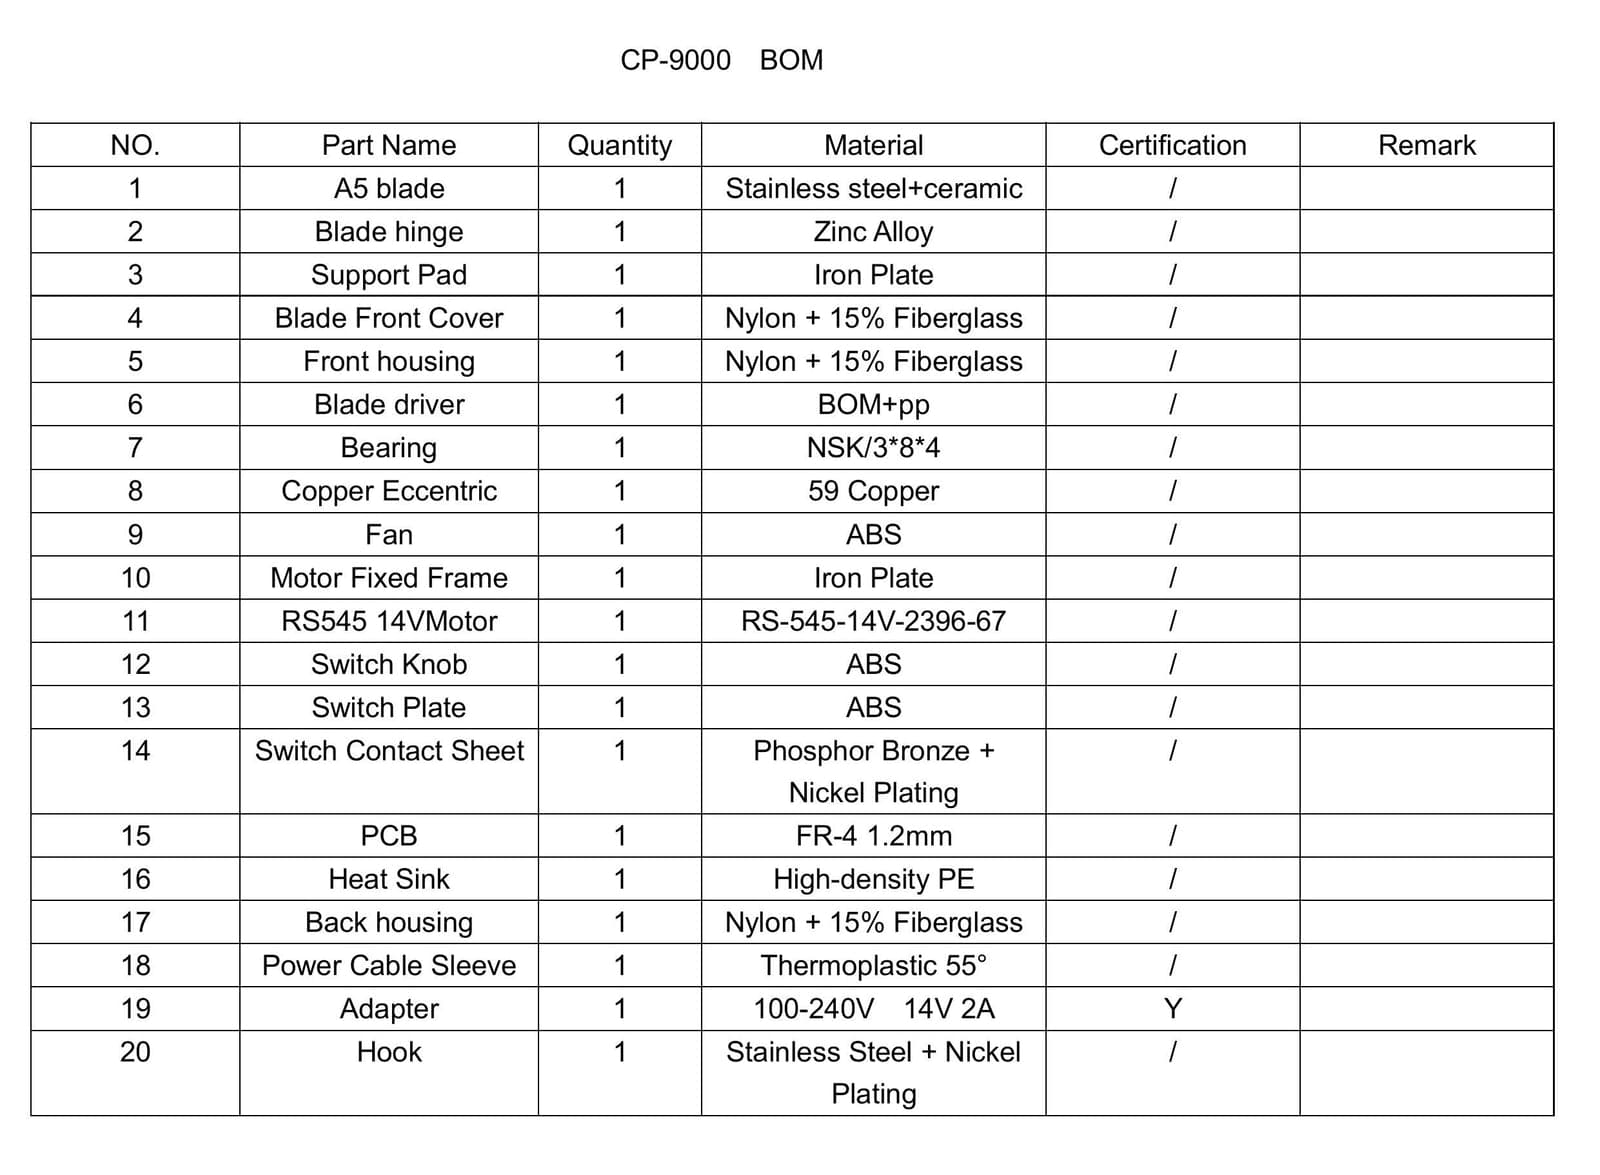
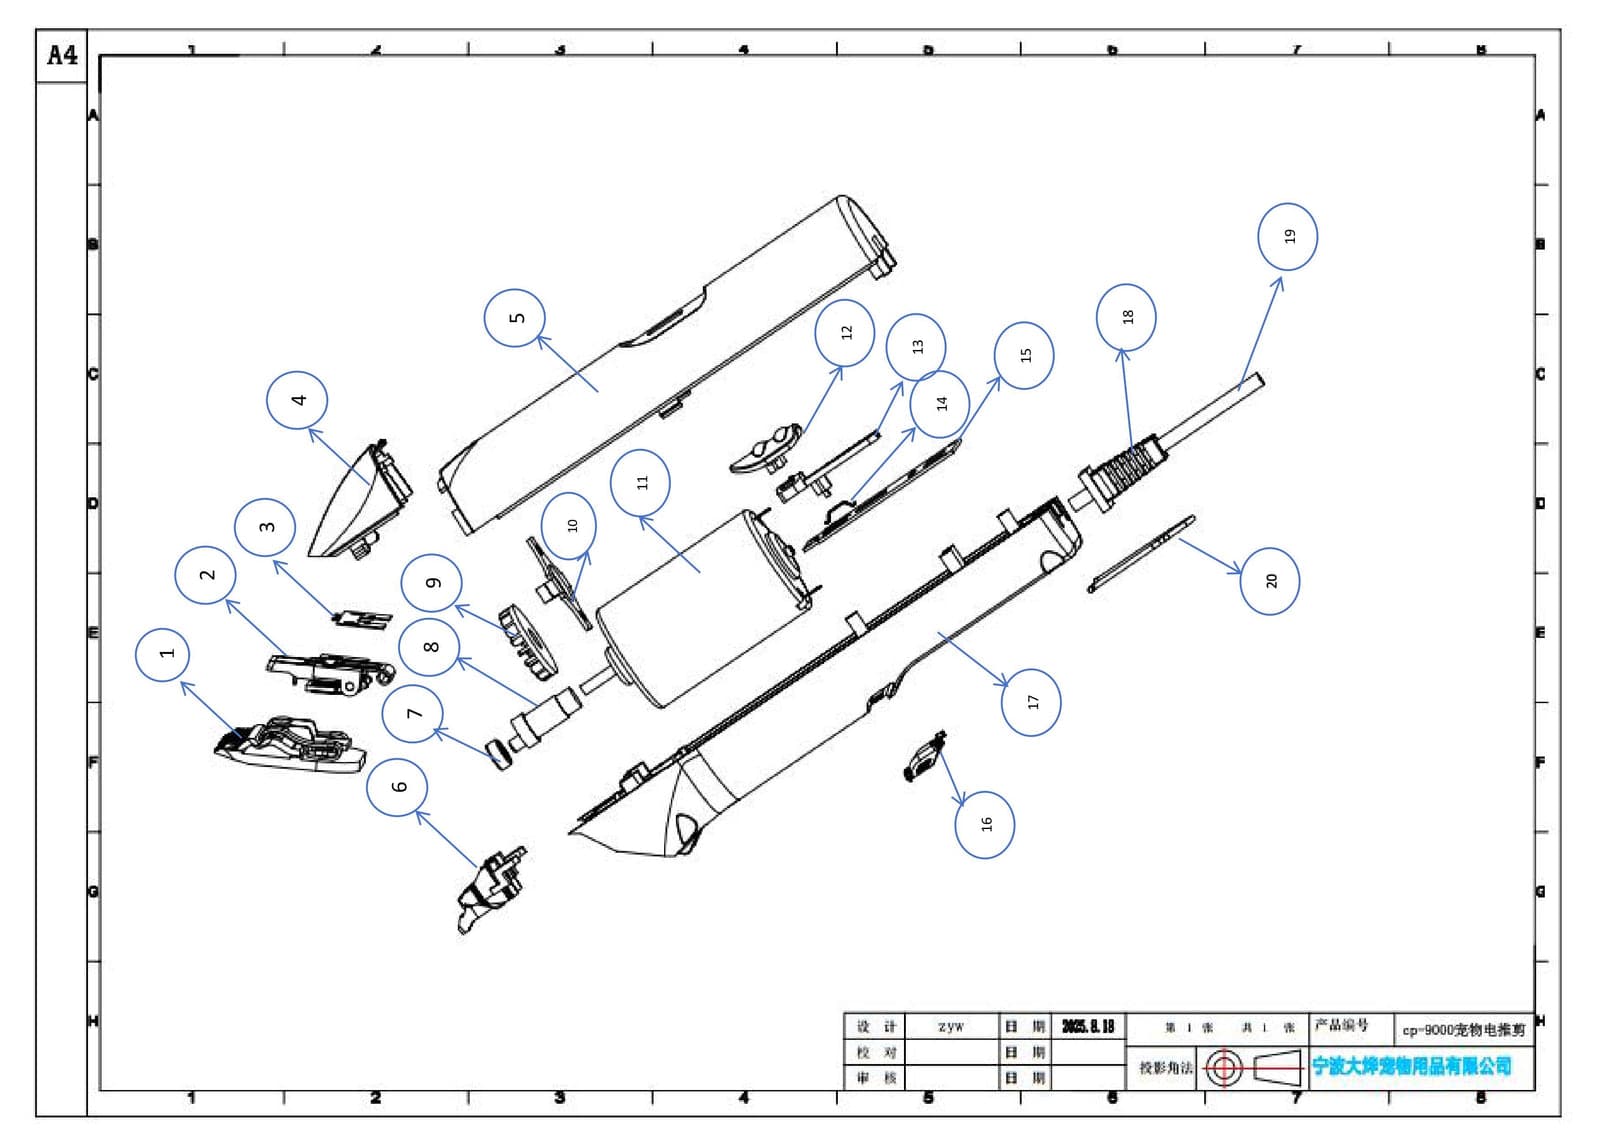
Motor, eccentric mechanism, blade drive, latch, bearings, battery and control electronics work as one system. Replacement parts should match the model specification.

3. Design Concepts

PCS clippers are engineered around stable torque, manageable temperature, serviceable components and compatibility with professional blade systems.

03

Usage Guidelines

1. Recommended Maintenance

Use only compatible blades and accessories. Do not force the clipper through tangled or dirty coats; prepare the coat first and monitor blade temperature during long sessions.

2. Wear Parts Information

Blade drives, cutters, batteries and selected seals are wear parts. Their service life depends on workload, coat condition, cleaning and lubrication frequency.

04

Blade & Cutting System

1. Blade Design and Material

PCS offers carbon-steel, stainless-steel and ceramic cutting options for different heat, durability and maintenance requirements.

2. Manufacturing Process

Blade geometry, heat treatment, grinding and final inspection are controlled to maintain tooth alignment and cutting consistency.

3. Blade Replacement

Switch off and unplug the clipper. Release the installed blade, clean the mounting area, seat the replacement securely and add oil before testing.

4. Maintenance and Longevity

Keep blades clean, dry and lightly oiled. Avoid impact, corrosive disinfectants and storage while damp.

Service reference

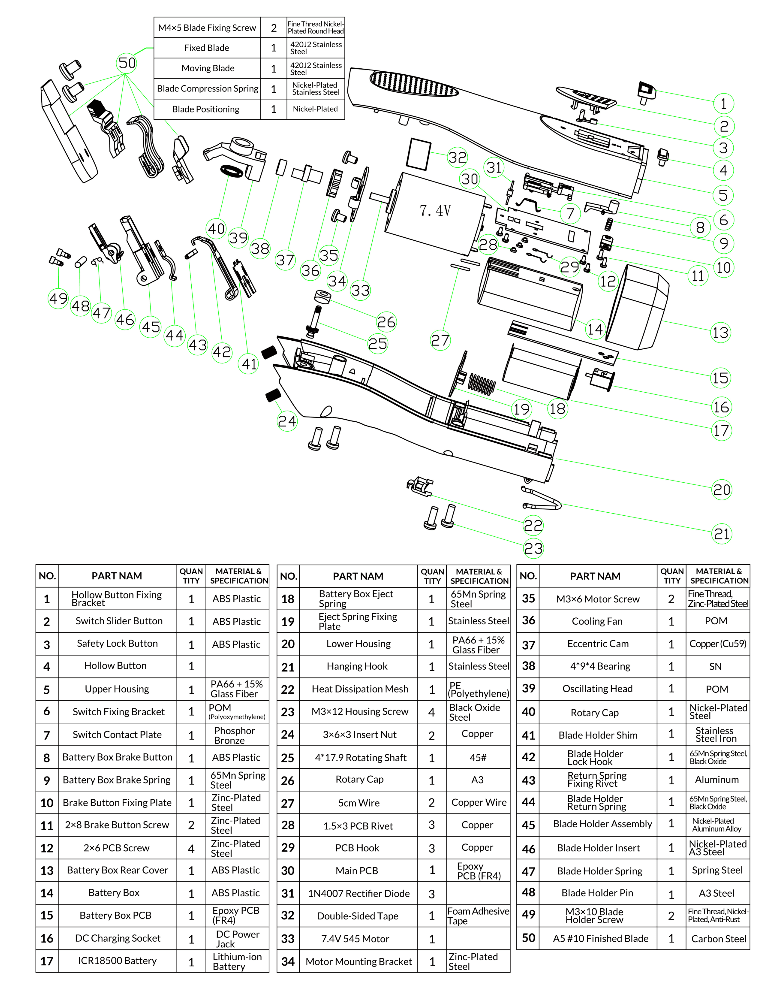
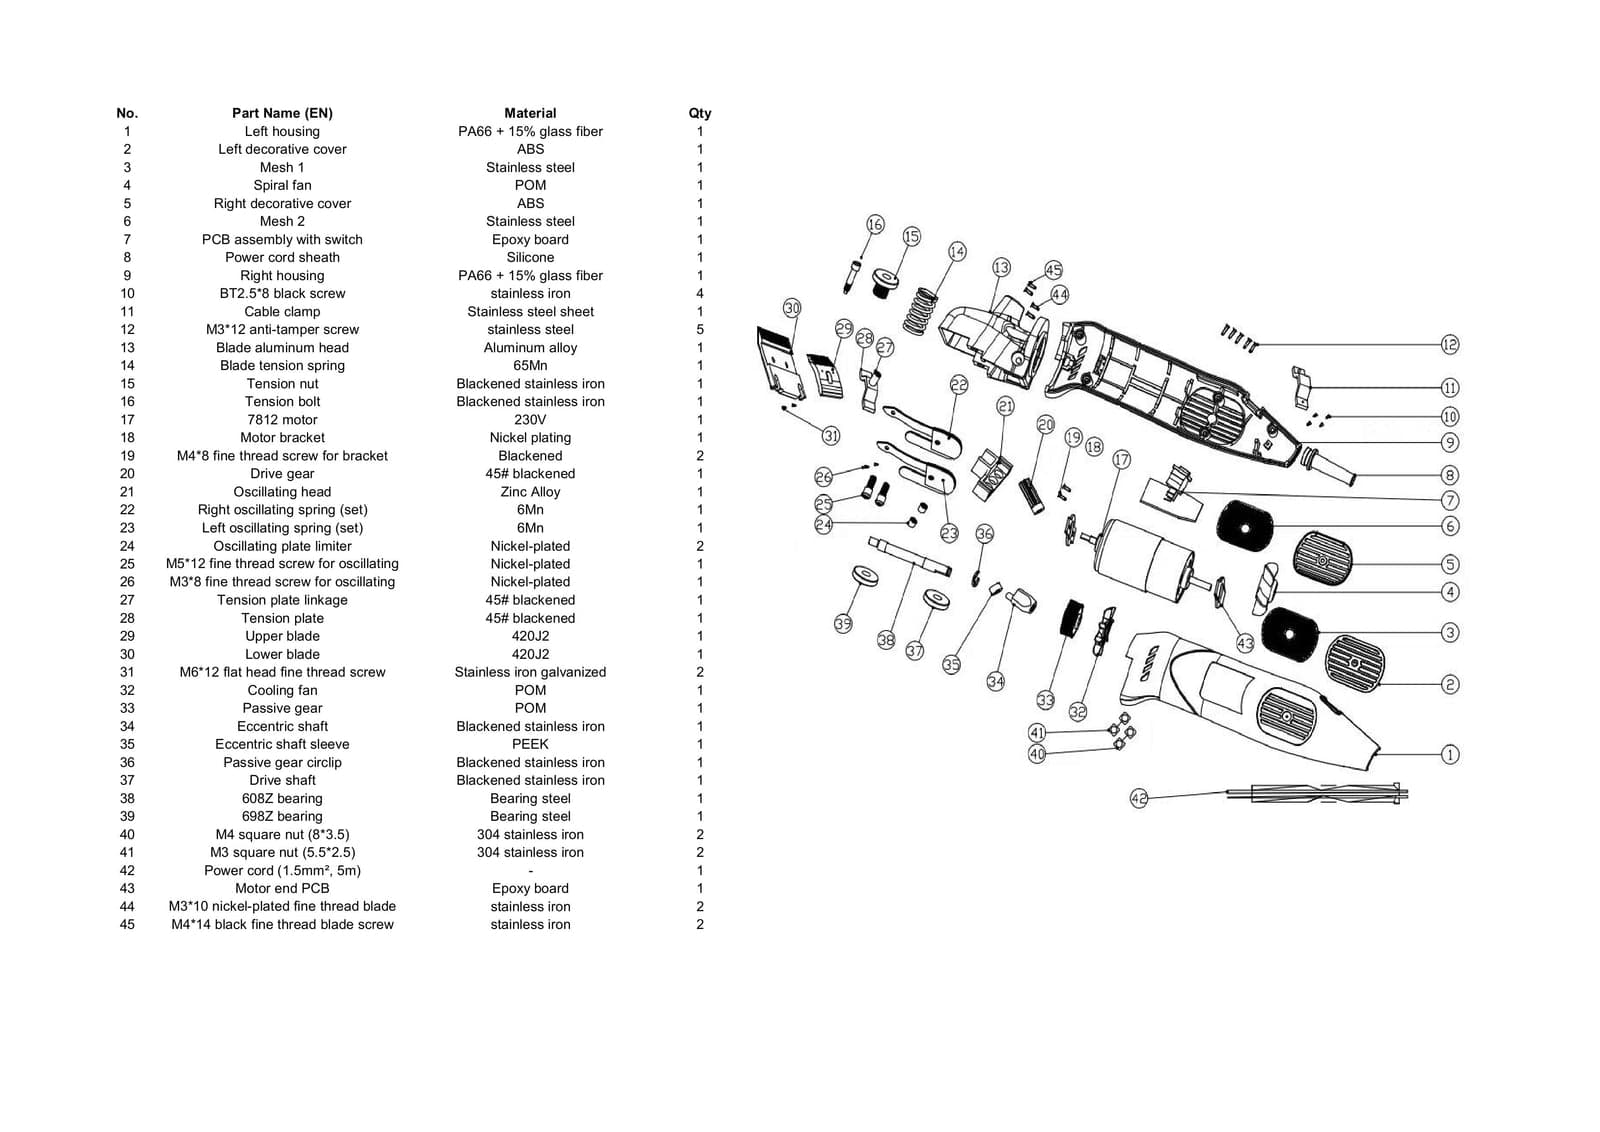
Exploded views

9000 — Front assembly exploded view
9000 — Front assembly
9000 — Internal assembly exploded view
9000 — Internal assembly
9020 exploded view
9020
9020C exploded view
9020C
9060 exploded view
9060
9120 exploded view
9120

Workshop guidance

Assembly videos

Clipper assembly

Clipper disassembly